The Shugmobile Conversion Thread


Okey dokey - Sat 8th April
Well, full day to work ,so no excuses this time. Got a lot done. Rich turned up and jumped in, which was much appreciated and really let us get on with a pile of things. Top bloke
Leading on from last time, first thing we did was got the engine out. Bit of jiggery-pokery here, as the winch is attached to the roof, therefore immobile. So, to get the engine out, we had to winch it up and set the car on a rolling bogey - which we wheeled out of the way - giving us room to set the engine down and work away
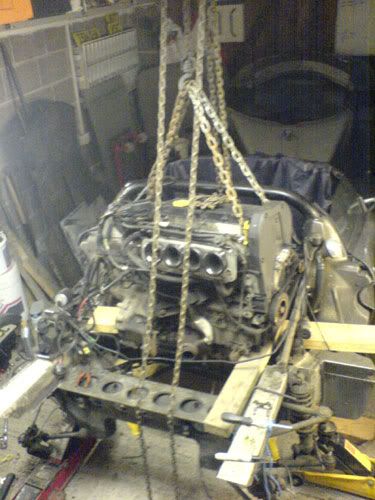
Next thing was to strip the necessary ancilliaries off the old engine and mount to the new. Alternator, throttle bodies, manifold, temp sensors, coolant piping and, oh yeah, the gearbox!
On taking off the exhaust, I think we've found one source of the oil consumption
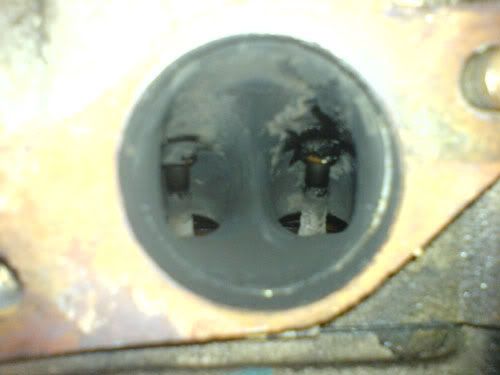
Valve stem seals are totally fscked.
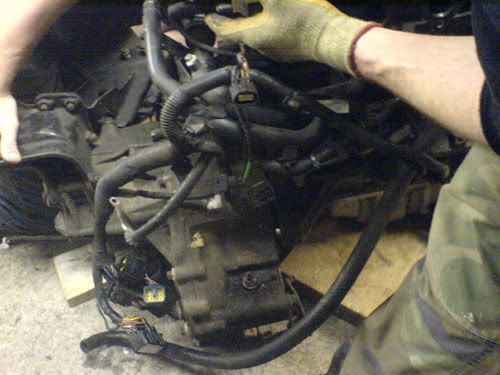
As Rich and David manhandled the gearbox off, I handled the plumbing for the remote stat/cooler combo. Seems like it should fit quite well - I've got it plumbed in loose and will make final adjustments when the new engine is in. Part of the kit is a blank for the old stat location - must be the job from hell changing this while the engine is in the car!!!
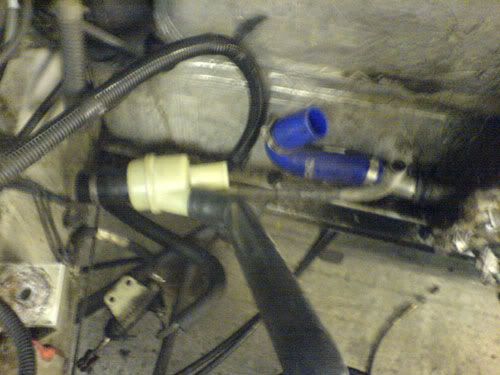
Half way through (ignore the 135deg pipe)
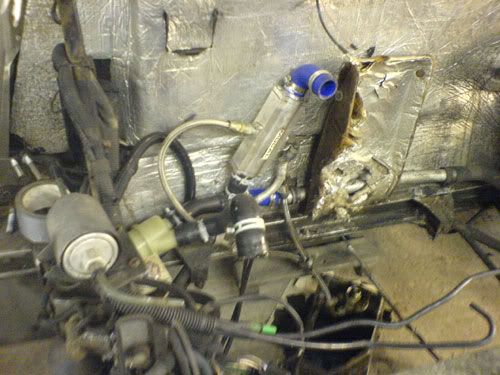
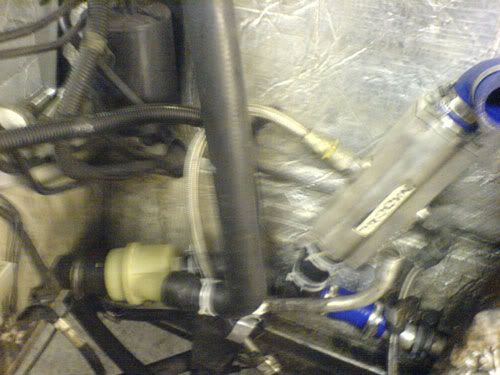
Done (sorry for the fuzzy pics - camera phone) This site http://web.tiscali.it/elise_s1/index.htm deals with it in a lot of detail - this setup is copied from Steve Butts 245bhp hillclimb car, so should work!
Then Rich & David handled the job of changing the timing belts on the new engine (taking no chances) Interesting job... Not difficult (when you read the manual, eh chaps?) but there are 2 belts - one at each end of the engine - and it's an interesting challenge making sure that everything is in the right place as they appear to be attached under the cam-cover by some form of dark magic! Still, with a few head-scratches and some worried looks from me, the team did a marvellous job and we turned the engine over (by hand) several times to make sure everything lined up and stayed lined up!
At the end of play today, we've got the new engine fully dressed and ready to be dropped in. We should get that done tomorrow, no problem. Still to do after that:
Rewire loom for emerald
Change rear wheel bearings
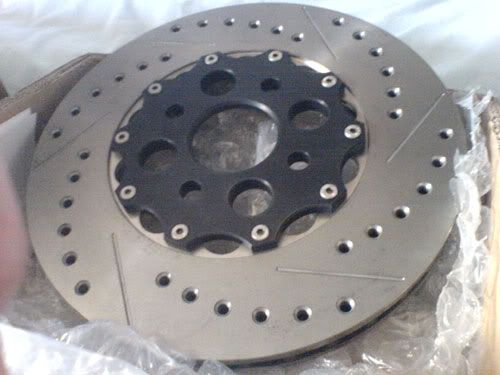
Change front & rear pads & disks
Remount clams
Coming along nicely
Well, full day to work ,so no excuses this time. Got a lot done. Rich turned up and jumped in, which was much appreciated and really let us get on with a pile of things. Top bloke
Leading on from last time, first thing we did was got the engine out. Bit of jiggery-pokery here, as the winch is attached to the roof, therefore immobile. So, to get the engine out, we had to winch it up and set the car on a rolling bogey - which we wheeled out of the way - giving us room to set the engine down and work away
Next thing was to strip the necessary ancilliaries off the old engine and mount to the new. Alternator, throttle bodies, manifold, temp sensors, coolant piping and, oh yeah, the gearbox!
On taking off the exhaust, I think we've found one source of the oil consumption
Valve stem seals are totally fscked.
As Rich and David manhandled the gearbox off, I handled the plumbing for the remote stat/cooler combo. Seems like it should fit quite well - I've got it plumbed in loose and will make final adjustments when the new engine is in. Part of the kit is a blank for the old stat location - must be the job from hell changing this while the engine is in the car!!!
Half way through (ignore the 135deg pipe)
Done (sorry for the fuzzy pics - camera phone) This site http://web.tiscali.it/elise_s1/index.htm deals with it in a lot of detail - this setup is copied from Steve Butts 245bhp hillclimb car, so should work!
Then Rich & David handled the job of changing the timing belts on the new engine (taking no chances) Interesting job... Not difficult (when you read the manual, eh chaps?) but there are 2 belts - one at each end of the engine - and it's an interesting challenge making sure that everything is in the right place as they appear to be attached under the cam-cover by some form of dark magic! Still, with a few head-scratches and some worried looks from me, the team did a marvellous job and we turned the engine over (by hand) several times to make sure everything lined up and stayed lined up!
At the end of play today, we've got the new engine fully dressed and ready to be dropped in. We should get that done tomorrow, no problem. Still to do after that:
Rewire loom for emerald
Change rear wheel bearings
Change front & rear pads & disks
Remount clams
Coming along nicely
2010 Honda VFR1200F
1990 Honda VFR400 NC30
2000 Honda VTR1000 SP1
2000 Kawasaki ZX-7R
1990 Honda VFR400 NC30
2000 Honda VTR1000 SP1
2000 Kawasaki ZX-7R

Your welcome Shug, but I'll expect a pax lap or 2!
You were pacing around when we discovered the 'ahem' miscalculation with the other belt... Bit of 'engine'uity got us there in the end...
Tip to all, when dealing with a VVC timing belt, RTFM! It's not as it looks! Well there were no crunchy noises when we turned it over anyway so it should be fine.......
You should have it all installed by tomorrow, running by next week?
When will DVA have the emerald back?
180 bhp eh? Like you need encouraging! Good to meet David too.
You were pacing around when we discovered the 'ahem' miscalculation with the other belt...
Tip to all, when dealing with a VVC timing belt, RTFM! It's not as it looks! Well there were no crunchy noises when we turned it over anyway
You should have it all installed by tomorrow, running by next week?
When will DVA have the emerald back?
180 bhp eh? Like you need encouraging! Good to meet David too.
1994 Lotus Esprit S4 - Work in progress
1980 Porsche 924 Turbo - Funky Interior Spec
2004 Smart Roadster Coupe - Hers
1980 Porsche 924 Turbo - Funky Interior Spec
2004 Smart Roadster Coupe - Hers
Dude, you're welcome to take it round for a few laps - you really did put in the graftRICHARDHUMBLE wrote:Your welcome Shug, but I'll expect a pax lap or 2!
If all goes to plan she'll be running one night next week. Week after at the latest (next weekend is tied up)
2010 Honda VFR1200F
1990 Honda VFR400 NC30
2000 Honda VTR1000 SP1
2000 Kawasaki ZX-7R
1990 Honda VFR400 NC30
2000 Honda VTR1000 SP1
2000 Kawasaki ZX-7R
-
minkypotglory

- Posts: 1118
- Joined: Tue Dec 27, 2005 7:49 pm
- Location: east lothian
- Contact:


Yeah - some cock has gone and painted your calipers when you weren't looking! You must have been pissed off about that
Top tip - to avoid corrosion of brake disks, liberally soak in WD40 when you park up..... ( c Viz 1988)
Top tip - to avoid corrosion of brake disks, liberally soak in WD40 when you park up..... ( c Viz 1988)
2010 Honda VFR1200F
1990 Honda VFR400 NC30
2000 Honda VTR1000 SP1
2000 Kawasaki ZX-7R
1990 Honda VFR400 NC30
2000 Honda VTR1000 SP1
2000 Kawasaki ZX-7R
-
Titanium S1 111S (gla)
- Posts: 956
- Joined: Wed Nov 16, 2005 3:31 pm
The timing on the VVC is a bit of a pain, I did the head gasket on the MGF I had a few years ago without taking the engine out and it took me an age and most of the skin on both hands to get it back together.
Was quite happy that I had it all set up correctly, turned it over and over by hand to check all was well. Held breath and started it up, all still well, bit of spluttering then smooth as silk. Put all the bits and pieces back together and drove it for a few miles only to discover that it was still pissing water. Turned out the water pump was knackered, nearly cried as I took the belt off.
Don’t you just love the K?