Page 13 of 17
Re: Duratec in detail
Posted: Thu Jan 28, 2016 6:34 pm
by David
Time for an update
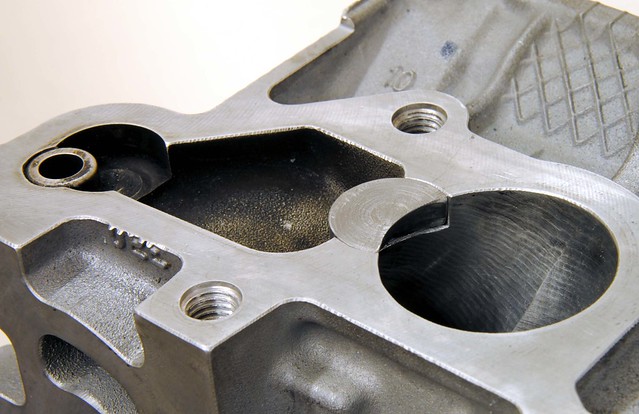
The engine went back together without any unexpected problems. The only thing to report was that I replaced the inlet cam, rings, and re-honed the bores. I spent quite a while waiting for a specialist honing brush to plateau finish them, but that was really a waste of time as the finish was not any better than the stone.

I also made a little profiled blanking plug for the exhaust
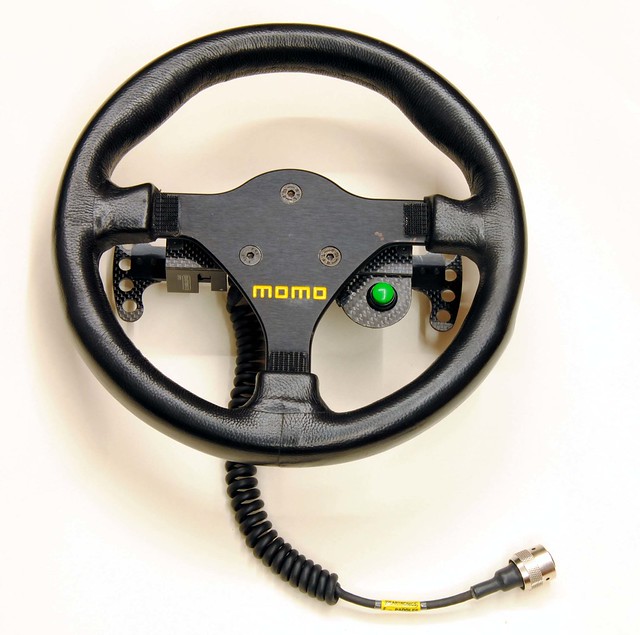
It was then back to the Geartronics paddle shift installation. I’m really enjoy fabricating bits, and I was in my element fitting the gearshift actuator. I wanted to retain the gearstick as the air bottle set-up was a bit of an unknown in terms of duration. Many designs later I finally settled on mounting it on the bell housing. This was the simplest and most robust solution. Here’s a picture of the prototype, which is essentially the same as the finished item.
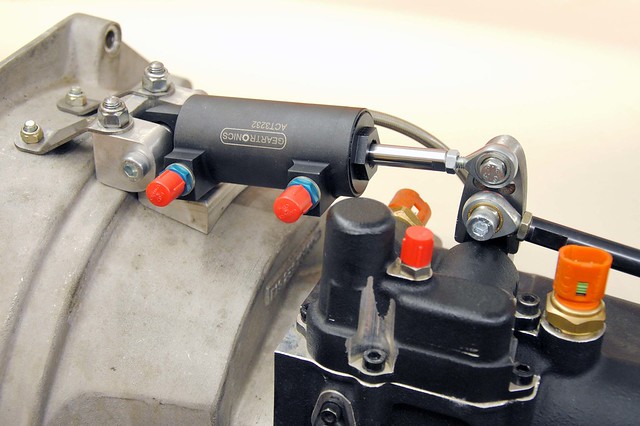
The actuator travel needed to be at least +-22mm and not more than +-24 mm so the lever had to be extended to give this. A simple design made of 12mm steel plate that sat over the Sadev lever.

The whole assembly worked really well although given more time and money I would have commission a CNC version of the bell housing mount. But the handmade version looked OK when it was painted black and fitted to the engine.
Next stage will be fitting the engine and gearbox in the car and installing all the other bit and throttle blipper.
Re: Duratec in detail
Posted: Thu Jan 28, 2016 7:39 pm
by robin
Nice; I like the blanking plug ... of course the shifter is great too

Re: Duratec in detail
Posted: Fri Jan 29, 2016 10:51 am
by Dominic
Great stuff David! Loving your work!

Re: Duratec in detail
Posted: Tue Mar 15, 2016 8:33 pm
by David
Time for an update
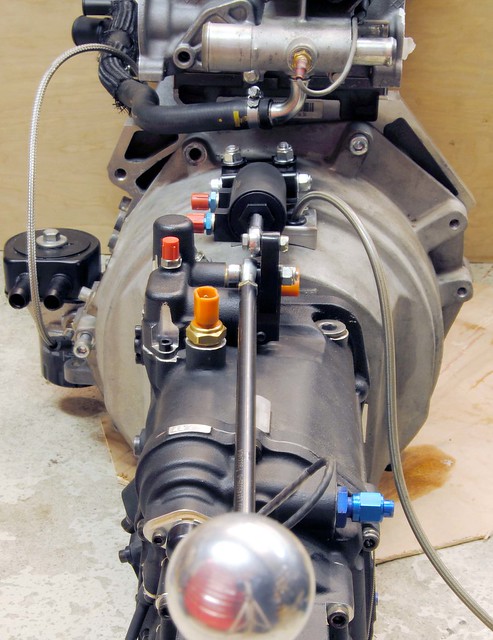
Fitting the engine and gearbox back in the car is pretty routine these days so nothing to report there. It started OK and was given a few minutes at 2000 rpm to settle in the new camshaft then a quick balance of the throttle bodies and that was that until the rolling road session to run it in. With the engine done, it was back to the paddle shift.
My original idea was to fit the paddle-shift kit on the passenger floor but that was soon dismissed as the length of the hoses posed a problem. So, after a brainstorming session, the plan was to replace the battery with a smaller lithium one and that gave the require space for the air bottle. It all worked out well in the end with the hoses nice and short - a significant performance factor for the actuators. The added bonus was the battery saved around 8 KG, so a net gain of around 2 KG overall.
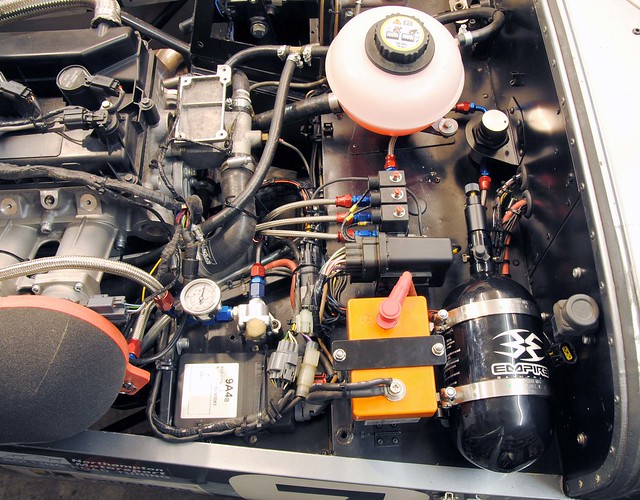
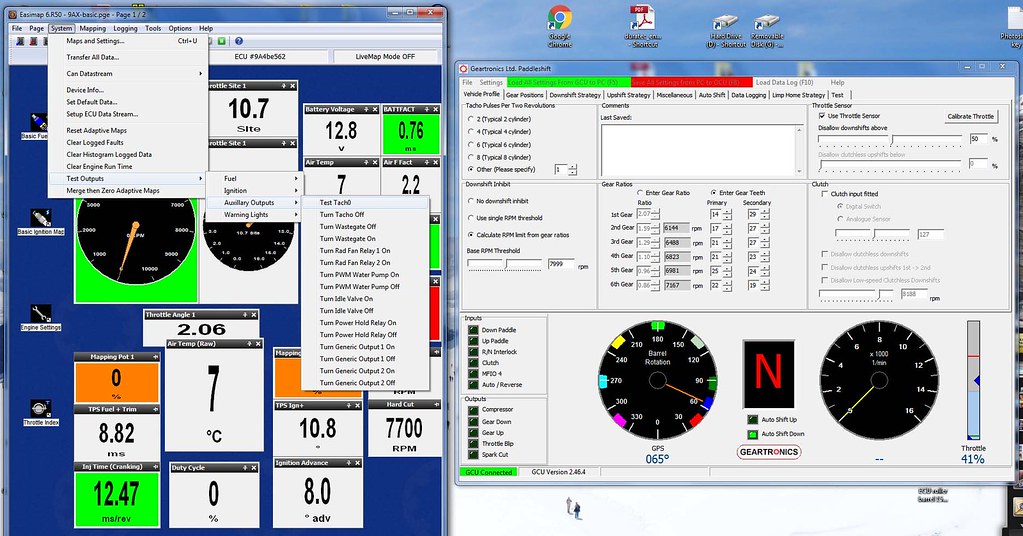
The custom loom made by Geartronics was a delight to install and fitted perfectly, the only significant job was opening up the ECU plug to add some wires. After powering it up, the main task was to calibrate barrel position. This was straightforward as I had already set the one half of the dual hall effect sensor to work with the 'easy shift' and gear display (a long trial and error process, but got there in the end). Next was to calibrate the throttle position, again straight forward, and then check the Tacho signal. That's were things started to go wrong. I just couldn't get it to work.
Discussing the matter with Geartronics resulted in some component level diagnostics and I was all set to send the GCU back when we realised that the ECU signal was just not of a high enough frequency for the GCU. Caterham use a very low frequency of one pulse per cycle (2 revolutions). But this turned out to be of no real consequence as the RPM (and frequency) in the gear changing band was high enough.
The MBE Easimap software and the Geartronic softare in the set up and testing phase . . .
The steering wheel was straightforward too, and just needed to be bolted together. The neutral button was placed out of the way of my normal hand position, on a slightly recessed a carbon tab. I may change this after some use, but didn't want to drill hole in the spokes without some use on track first.
It was then just down to turning on the air bottle and testing it.
Watch on YouTube
The test logged the time of each change, the target up-shift time being between 20-60 ms, mine came in around 20 ms which was a little too fast, so we reduced the the pressure to provide less stress to the mechanics and save some air usage too. The down-shift time includes the blipper and time for the engine to respond, so is much longer - typically 60-150 ms.
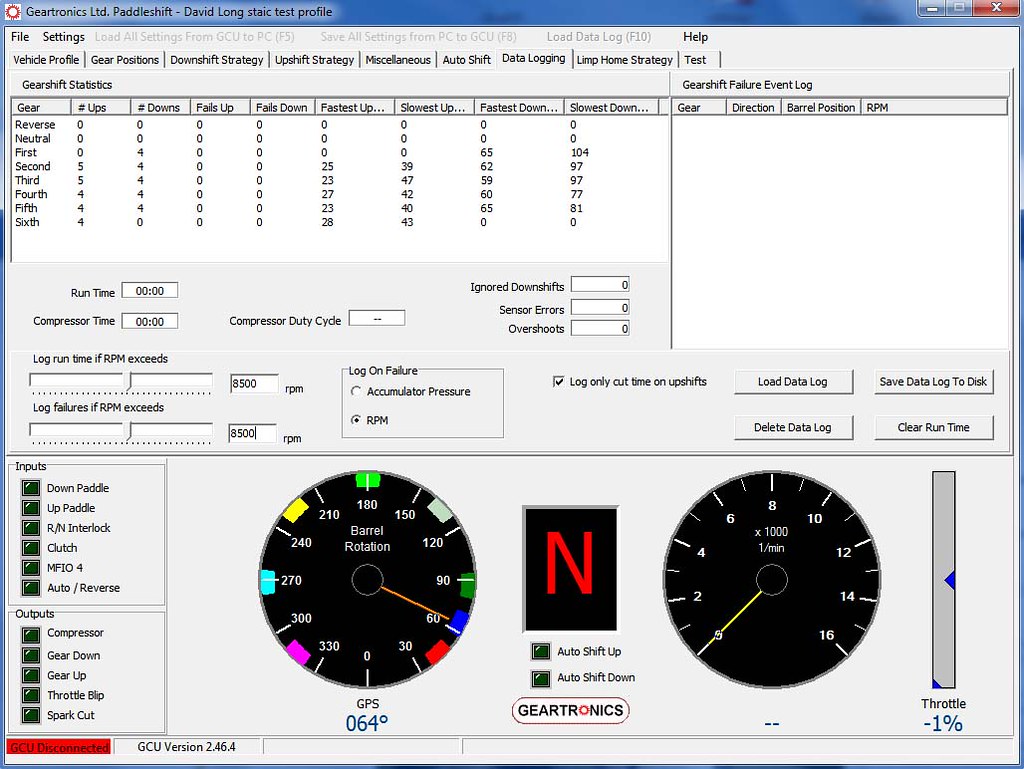
The test was then repeated with the engine running (no video I'm afraid) and it all worked as it should. No missed or failed shift since testing began, so happy so far. First track test will be SIDC later this month
Re: Duratec in detail
Posted: Wed Mar 16, 2016 1:23 pm
by Sanjøy
Wow
Re: Duratec in detail
Posted: Wed Mar 16, 2016 1:37 pm
by Dominic
Sanjoy wrote:Wow

Impressive attention to detail. Great write up, thanks for sharing.
Re: Duratec in detail
Posted: Wed Mar 16, 2016 3:35 pm
by robin
Great stuff!
That'll be 4 seconds a lap quicker around Hethel, I should think
Cheers,
Robin
Re: Duratec in detail
Posted: Wed Mar 16, 2016 3:37 pm
by Shug
Massively admire the attention to detail with all of this.
The car will be an absolute weapon.
Re: Duratec in detail
Posted: Wed Mar 16, 2016 3:59 pm
by graeme
Very, very
Re: Duratec in detail
Posted: Sat Mar 26, 2016 6:38 pm
by David
First track test this morning . . .
Watch on YouTube
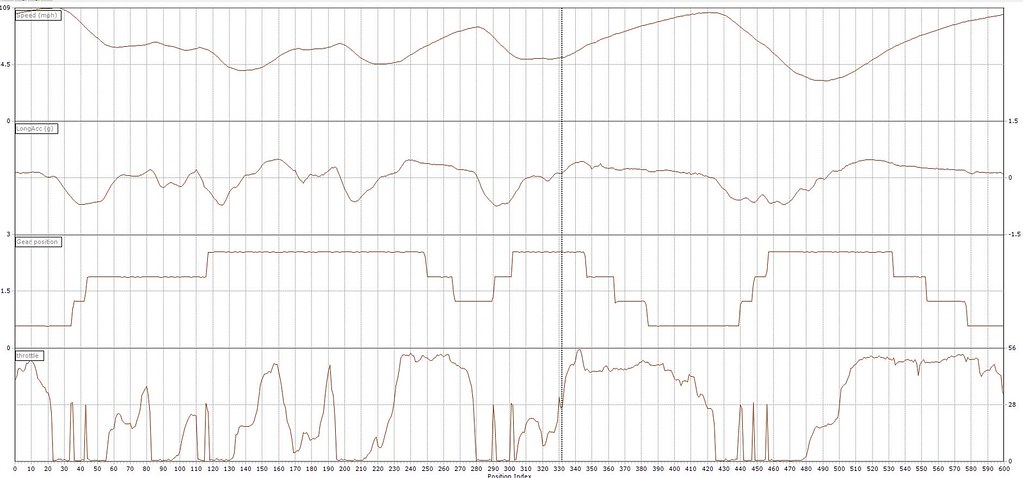
The graph show CT data for one lap - I only seemed to have used up to 56% throttle as it was the first track session for the engine too, and I was taking it easy.. But a 59 second lap of Knockhill at half throttle suggests a lot of promise.
Relieved and happy
Re: Duratec in detail
Posted: Sun Mar 27, 2016 10:09 am
by Scottish Scrutineer
Looking forward to seeing your times in SLS next month
Sent from my iPhone using Tapatalk
Re: Duratec in detail
Posted: Mon Mar 28, 2016 11:21 am
by ed
Loving your work!

Re: Duratec in detail
Posted: Tue Apr 12, 2016 11:34 am
by Evoman
I am totally mesmerised by the sound of that engine, so characterful for a four pot. I guess it sounds different with the sequential box the way it engages the next gear but to me that video from April 2014 the engine sounded so guttural and just 'on it' it's brilliant. Fantastic engineering work, I wish I knew how to do a fraction of the work you've done. I was chatting to a chap that owns a 620R yesterday, I suspect these two cars would be quite close in performance.
Re: Duratec in detail
Posted: Tue Apr 12, 2016 1:36 pm
by David
I did swap some data with Greig McArthur's 620R around Knockhill and they were amazingly similar - both in the 54 secs. I think he had it by a 1/10, but that was with him on slicks and me on 1B. My advantage is weight, the 620R has a lot more cooling kit to make the supercharger work. I think any engine heading towards 9K sounds good

Re: Duratec in detail
Posted: Wed Apr 13, 2016 12:53 pm
by Evoman
That is incredible that your car is on a par with that beast that is the 620R. Impressive stuff.