S1 rear toe-link balljoint hub spacers.

The place to "speak geek"
2F45T4U
Posts: 312
Joined: Wed Nov 21, 2007 10:35 am
Location: Aberdeenshire

S1 rear toe-link balljoint hub spacers.

Post by 2F45T4U » Sat May 23, 2015 8:04 pm

Ive just done a wheelbearing on the NS rear.

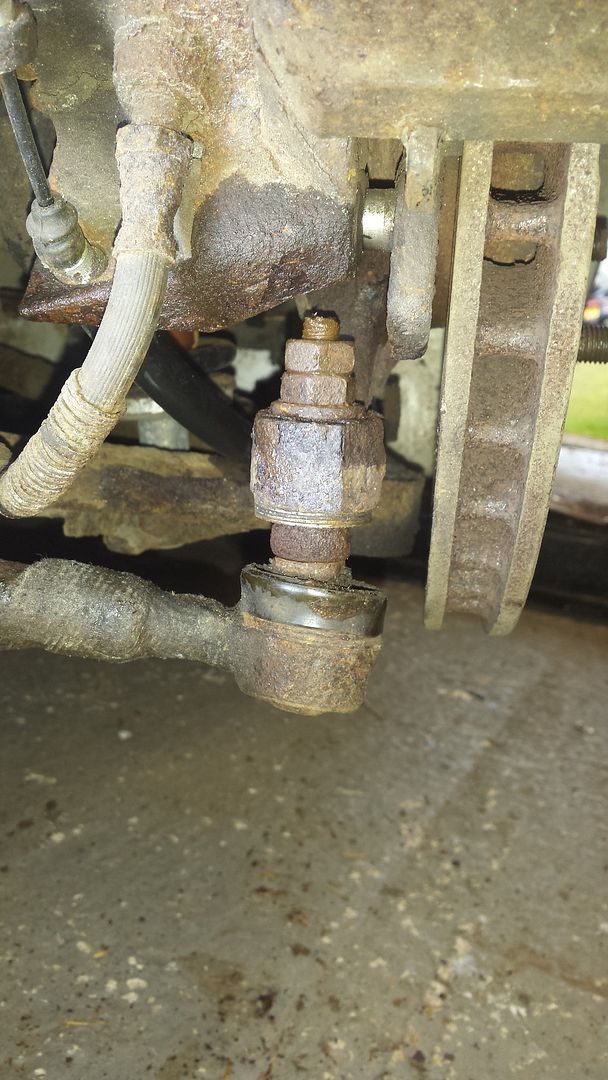
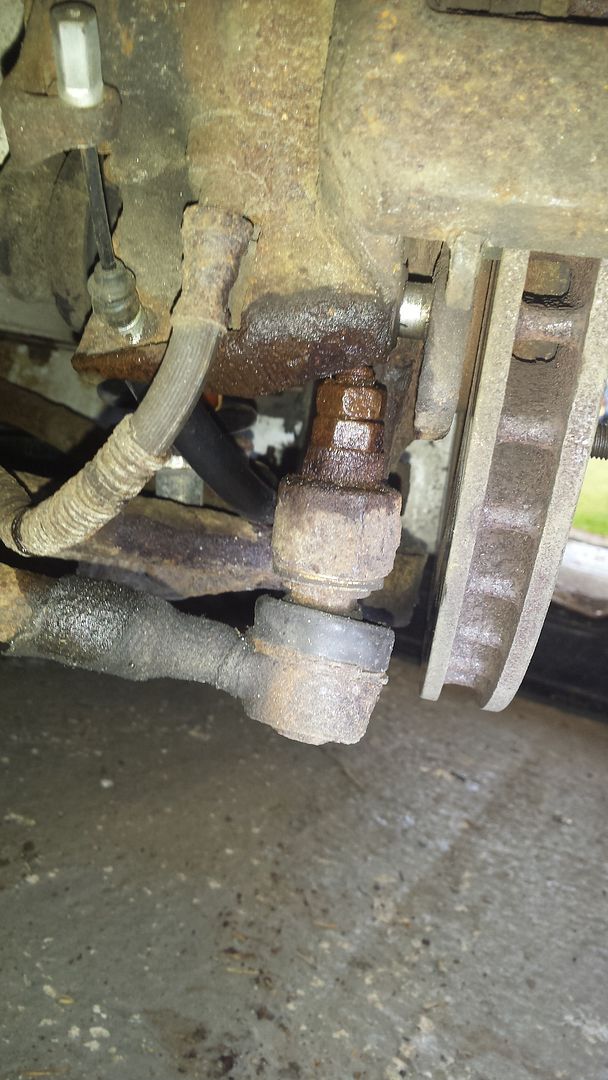
when i took the outer toe-link off the hub, i noticed the spacer (approx 10mm) was above the hub, ie under the nut and not on the balljoint side with the shims.
I have the later type of balljoint with the integral stud.
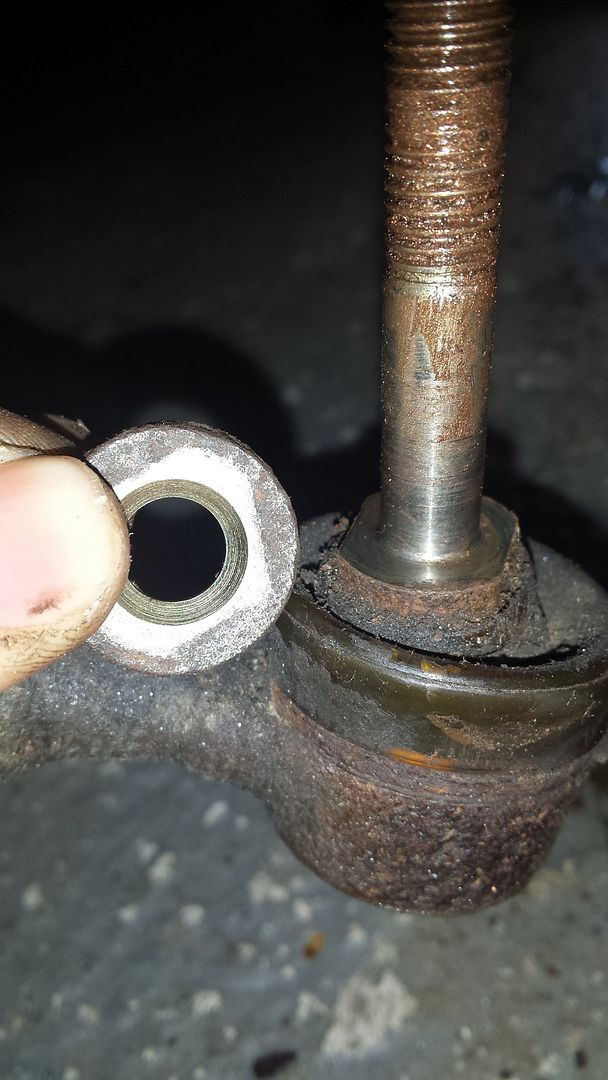
Ive checked the manual and it looks like this is wrong and that it should be on the underside so that it acts with the shims. But its not 100% clear. My 'conical spacer' doesnt appear to be conical, and the plain washer has a countersunk hole which is a bit random and it seems a bit thicker than i'd expect a plain washer to be so im not sure if that goes on the top or the bottom.

Image


ive checked the other side and they have both been set up the same so here iam asking for assistance.


cheers,

2F45T4U
Posts: 312
Joined: Wed Nov 21, 2007 10:35 am
Location: Aberdeenshire

Re: S1 rear toe-link balljoint hub spacers.

Post by 2F45T4U » Sat May 23, 2015 8:09 pm

Image

User avatar
roadboy
Posts: 1599
Joined: Tue Jul 25, 2006 11:51 pm
Location: Newcastle Upon Tyne
Contact:

Re: S1 rear toe-link balljoint hub spacers.

Post by roadboy » Wed May 27, 2015 9:36 pm

Do you have steel or ali rear uprights?

Dan
SPS Automotive
Independent Lotus Specialists
http://www.spsautomotive.co.uk

User avatar
tut
Barefoot Ninja
Posts: 22975
Joined: Tue Mar 15, 2005 5:53 pm
Location: Tut End, Glen of Newmill

Re: S1 rear toe-link balljoint hub spacers.

Post by tut » Wed May 27, 2015 9:51 pm

Bloody hell, thought that you had been put out to stud............

tut

2F45T4U
Posts: 312
Joined: Wed Nov 21, 2007 10:35 am
Location: Aberdeenshire

Re: S1 rear toe-link balljoint hub spacers.

Post by 2F45T4U » Wed May 27, 2015 9:52 pm

Steel

User avatar
roadboy
Posts: 1599
Joined: Tue Jul 25, 2006 11:51 pm
Location: Newcastle Upon Tyne
Contact:

Re: S1 rear toe-link balljoint hub spacers.

Post by roadboy » Wed May 27, 2015 11:14 pm

tut wrote:Bloody hell, thought that you had been put out to stud............

tut
Me or him? :D
SPS Automotive
Independent Lotus Specialists
http://www.spsautomotive.co.uk

User avatar
roadboy
Posts: 1599
Joined: Tue Jul 25, 2006 11:51 pm
Location: Newcastle Upon Tyne
Contact:

Re: S1 rear toe-link balljoint hub spacers.

Post by roadboy » Thu May 28, 2015 10:35 pm

If you have steel uprights you will have the same setup as early S2s. There should be one spacer above and one below the upright.

Bump steer must be horrendous on that.

Dan
SPS Automotive
Independent Lotus Specialists
http://www.spsautomotive.co.uk

2F45T4U
Posts: 312
Joined: Wed Nov 21, 2007 10:35 am
Location: Aberdeenshire

Re: S1 rear toe-link balljoint hub spacers.

Post by 2F45T4U » Fri May 29, 2015 7:30 am

Thanks Dan.

Do you mean the wider of the two on the bottom with the shims and the countersunk washer on the top with the nut? Or is the washer classed as a shim and there should be a plain washed under the nut?

Bump steer has always been bad but its been in this configuration for all the years ive had it.

Cheers.

2F45T4U
Posts: 312
Joined: Wed Nov 21, 2007 10:35 am
Location: Aberdeenshire

Re: S1 rear toe-link balljoint hub spacers.

Post by 2F45T4U » Sat May 30, 2015 6:38 pm

After and before shots, but what one is right? can someone check their car and let me know?

cheers,

Image

Image

User avatar
Stephen
Posts: 1439
Joined: Thu Apr 28, 2005 8:43 pm
Location: Brocketsbrae Nr Lesmahagow

Re: S1 rear toe-link balljoint hub spacers.

Post by Stephen » Sun May 31, 2015 9:50 am

Image
Here is mine late S1 all be it snapped!
If you're not living on the edge you're wasting too much space!

2F45T4U
Posts: 312
Joined: Wed Nov 21, 2007 10:35 am
Location: Aberdeenshire

Re: S1 rear toe-link balljoint hub spacers.

Post by 2F45T4U » Sun May 31, 2015 9:56 am

Thanks for that Stephen.

Seems mine were right the first time. The spacer must go on top to give the bolt some stretch.

User avatar
robin
Jedi Master
Posts: 10544
Joined: Mon Mar 27, 2006 1:39 pm

Re: S1 rear toe-link balljoint hub spacers.

Post by robin » Sun May 31, 2015 11:19 am

I think you are misunderstanding the spacers. In your most recent pictures (after/before) I am not sure which is which. I believe the first picture to be incorrect and the second picture to be correct - the thicker spacer goes between the nut and the hub.

See this assembly diagram:

Image

The correct stack up during assembly is:

Balljoint [40]
Conical spacer [38] with chamfered/countersunk section facing the rubber boot; this part should be about 3mm thick; it's the part nearest your pinkie in the original photo of the spacers and you have it chamfered face up in that picture.
Bump steer washer stack [37]
Hub carrier eye [1]
Thick spacer [39]; this part should be about 10mm thick.
Nyloc nut [12]

Note there is no washer underneath the nut in the assembly diagram.

I once got some flak for putting a bunch of unused bump steer washers between the nut and the 10mm spacer. Personally I can see no reason why any number of washers here will make a difference, but apparently that's why the toe link kit failed ... so it's up to you whether you put 0, 1 or more washers into that gap.

AFAIK the point of the 3mm spacer is to allow for a small radius on the balljoint root (where the stud meets the ball). If it weren't for the chamfer/countersink in the spacer then this root would have to be machined to be perfectly square, or the washer/spacer/hub would get jammed on the radius during tightening.

The conical aspect (which is visible in the diagram you posted) has been "superseded" by simply using some bigger washers that can adapt directly from the diameter of the 3mm spacer to the diameter of the eye in the hub.

I hope this is both accurate and helpful.

Cheers,
Robin
I is in your loomz nibblin ur wirez
#bemoretut

2F45T4U
Posts: 312
Joined: Wed Nov 21, 2007 10:35 am
Location: Aberdeenshire

Re: S1 rear toe-link balljoint hub spacers.

Post by 2F45T4U » Sun May 31, 2015 11:48 am

This explains it perfectly Robin. That plus the photo from Stephen demonstrates the setup was right all along.
Although im sure you can see where the confusion has come from...

What you're saying about the countersunk washer makes sense. This should be countersink face down (against the ball) if this is the case.

If anything i can see there being more stress placed on the stud when less than the prescribed washers are used. Using more will make it less tensioned for the same torque applied but there should be no reason why it would break prematurely.

Since someone has clearly thought about this and added the spacers i'd go with nothing more than a plain washer under the nut.

2F45T4U
Posts: 312
Joined: Wed Nov 21, 2007 10:35 am
Location: Aberdeenshire

Re: S1 rear toe-link balljoint hub spacers.

Post by 2F45T4U » Sun May 31, 2015 1:09 pm

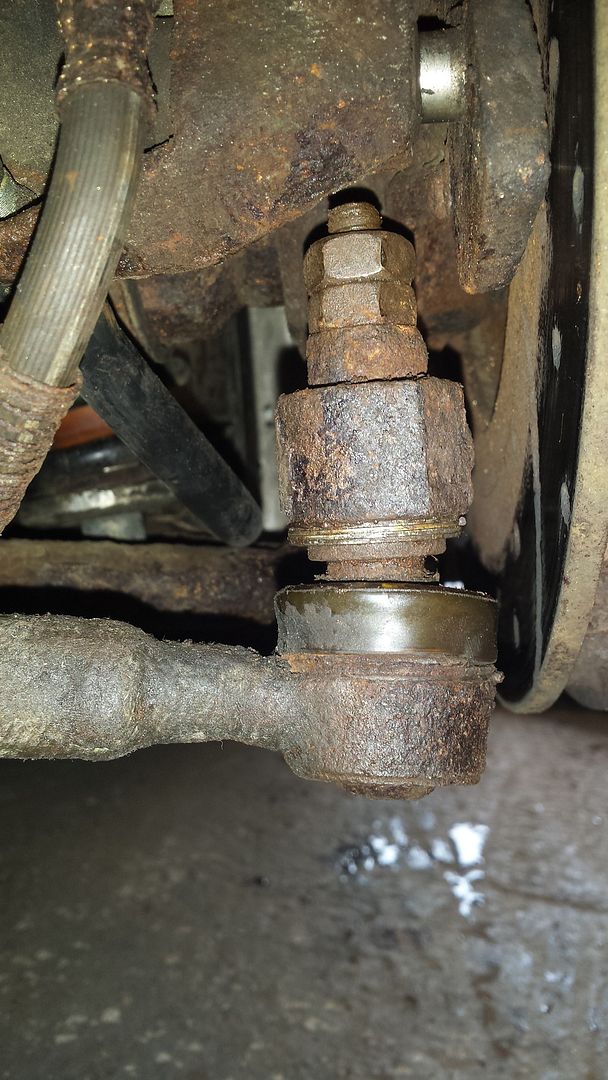
Ive changed them both back as discussed.

Image

Image

Thanks for the help.

Fraser

User avatar
robin
Jedi Master
Posts: 10544
Joined: Mon Mar 27, 2006 1:39 pm

Re: S1 rear toe-link balljoint hub spacers.

Post by robin » Sun May 31, 2015 2:41 pm

P.S. I think the top spacer is literally there to make it easier to assemble because you don't have to wind the nyloc down so far on the thread before it starts to clamp - I don't think it's there as a "torque" relief on the bolt - the point of tightening torque is (normally) to reach the point at which the bolt stretches and I would guess that for a given M10 bolt of this type, it's happy to be stretched across its full length just as much as across the shortest possible length (i.e. just before you run out of thread).

P.P.S. if worried about bolt stretch, you should find a suitable nyloc and replace that double nut arrangement as the only way to stop that coming undone is to tighten up to stretch point across a very much smaller distance than the one discussed above ;-)

Cheers,
Robin
I is in your loomz nibblin ur wirez
#bemoretut

Post Reply